How-to Assemble Your Floating Record
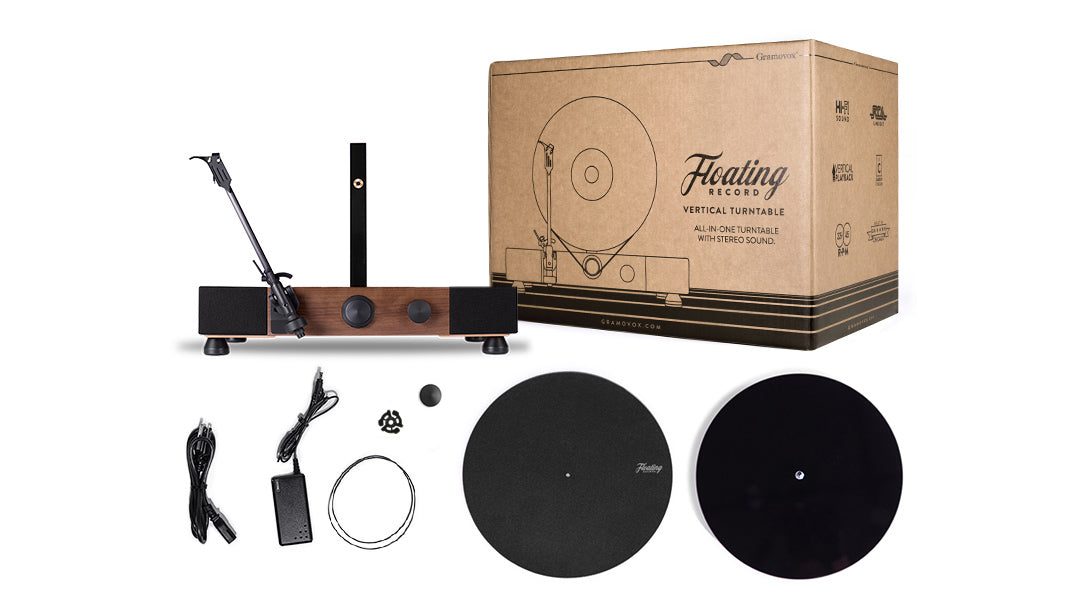
What’s in the box?
- 1 MDF Base with Acrylic Plinth and Carbon Fiber Tonearm
- 1 Acrylic Platter
- 1 Plastic Record Clamp
- 1 45 RPM Record Adapter
- 1 Silicone Belt
- 1 Felt Slipmat
- 1 Power Adapter
- 1 Power Cord
- 1 Stylus Cover
- Pre-installed AT95E Cartridge
Assembly Steps:
- Place the Floating Record base on a stable surface.
- Insert the spindle of the platter into the corresponding hole on the plinth.
- Assemble the power adapter by connecting the cord to the adapter brick, and then plug in the Floating Record to a wall outlet.
- Unscrew the record clamp and place the felt mat on the platter.
- Screw the record clamp back on.
NOTE: Set up the Floating Record out of reach of children and pets, and in a low-traffic area.
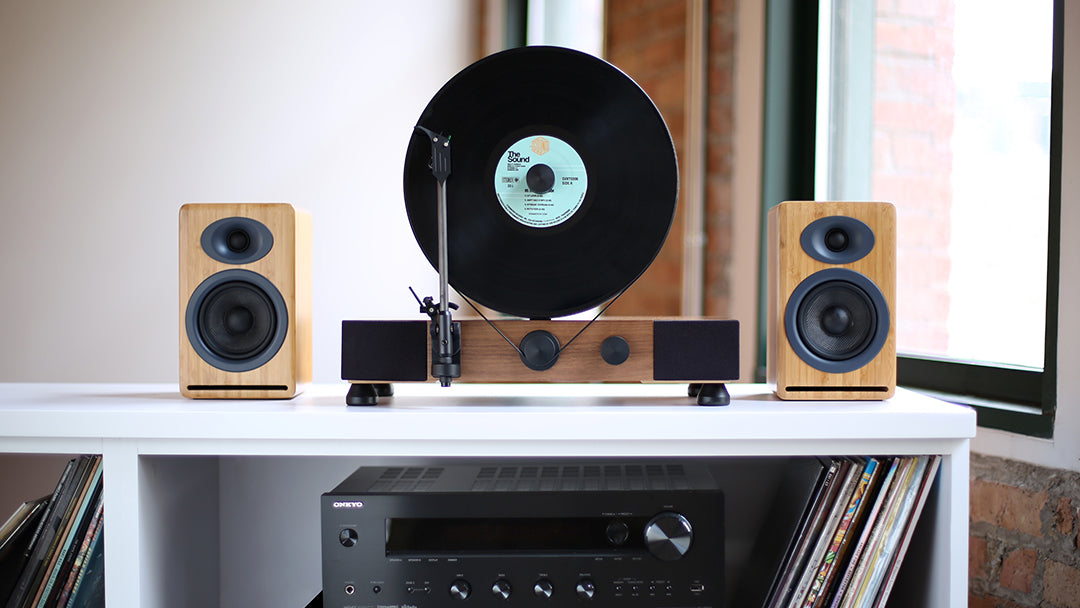
External Speaker Setup
- First, ensure that your receiver and/or speakers have RCA cables and RCA line-in jacks.
- Connect the RCA cables from your system into the RCA outputs on the Floating Record.
- The onboard speakers on the Floating Record will still be active, even while connected to an external speaker system. You can mute the onboard speakers by pressing the “Mute” button on the back of the base.
- When using external speakers, the volume must be controlled via the external system, not the onboard volume knob.